The Battle of Kennesaw Mountain

June 27th, 1864

The battle of Kennesaw Mountain was really an extended operation that lasted for several days before and after the 27th.  Troops were under small arms and cannon fire daily, the 27th was day of the main Federal Assault at Cheatham’s Hill, also known as the Dead Angle, as well as the area of Pigeon Hill and the remainder of the Federal left.  After days of a stalemate, General Sherman was frustrated and ordered a frontal assault on the Confederate Lines.  The attack was to begin at 8:00am on the 27th, but was delayed for nearly an hour.  Their goal was to break the Confederate line at what they thought was the weakest point.  They chose Cheatham’s Hill due the salient in the line.  General Sherman ordered General McPherson to use his Army of the Tennessee to attack the right of the Confederate line as a diversion to the main assault.  McPherson’s diversionary attack was carried out against Big Kennesaw, Little Kennesaw, and Pigeon Hill.  General Schofield, who was still positioned astride the Powder Springs Road near Kolb’s Farm, was ordered to keep extending the Federal right flank in an attempt to reach the end of the Confederate lines and turn their flank.  General Thomas and his Army of the Cumberland were positioned in the center of the Federal lines.

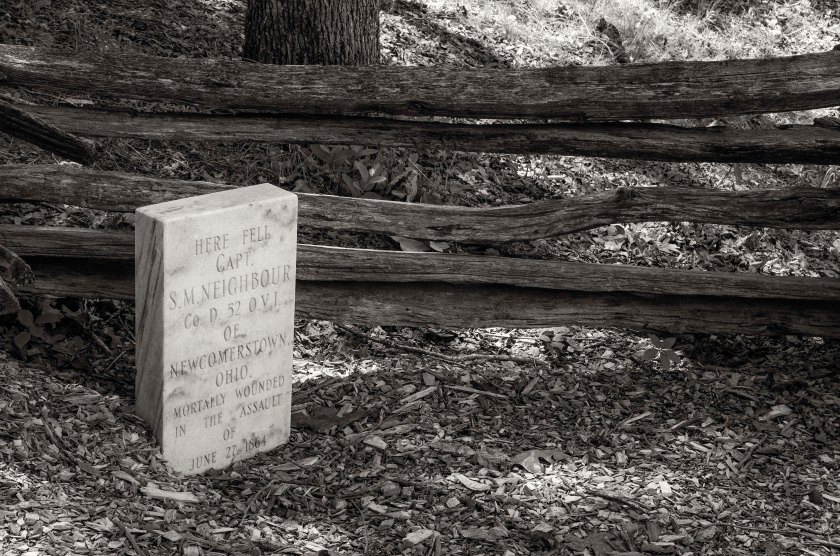
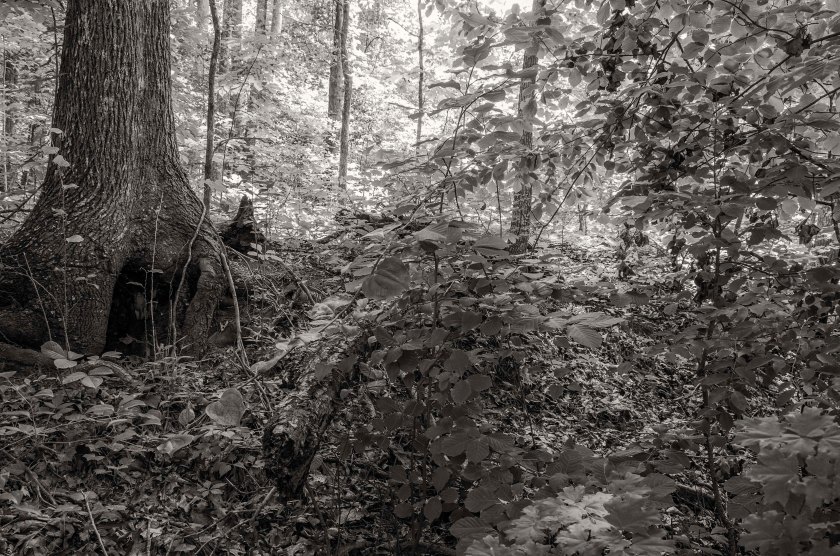
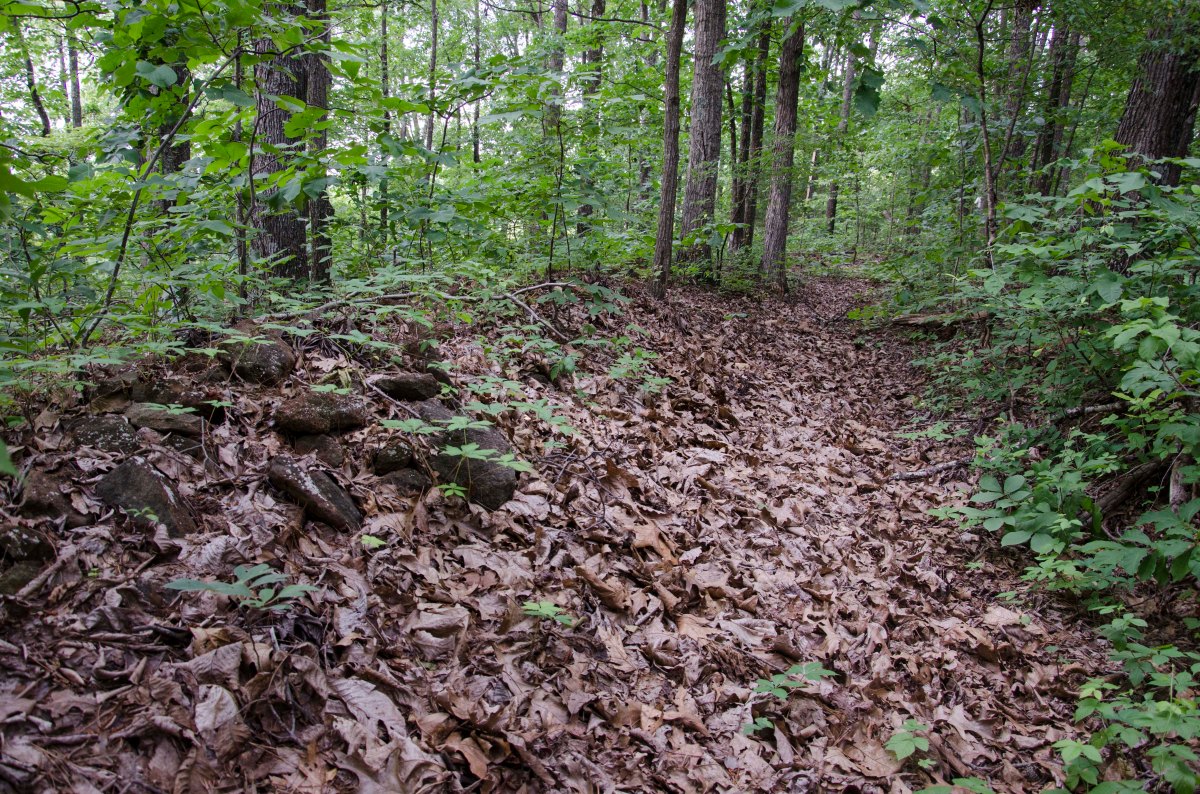
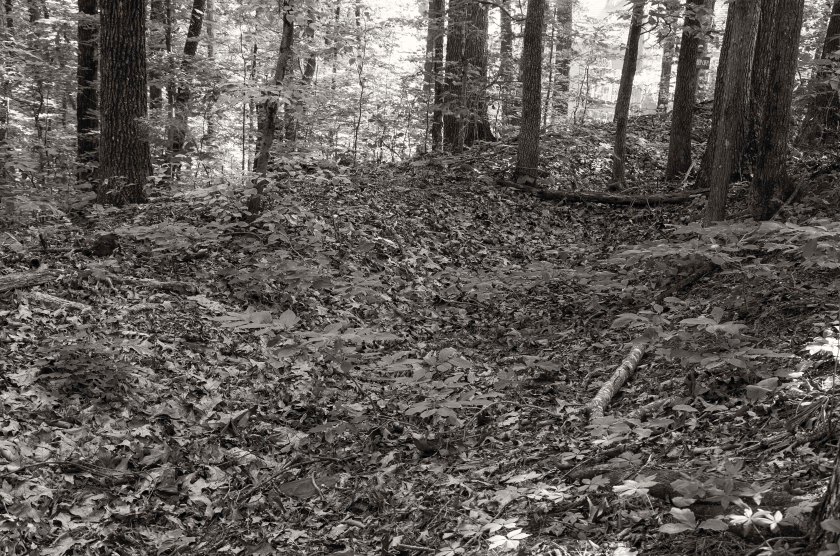
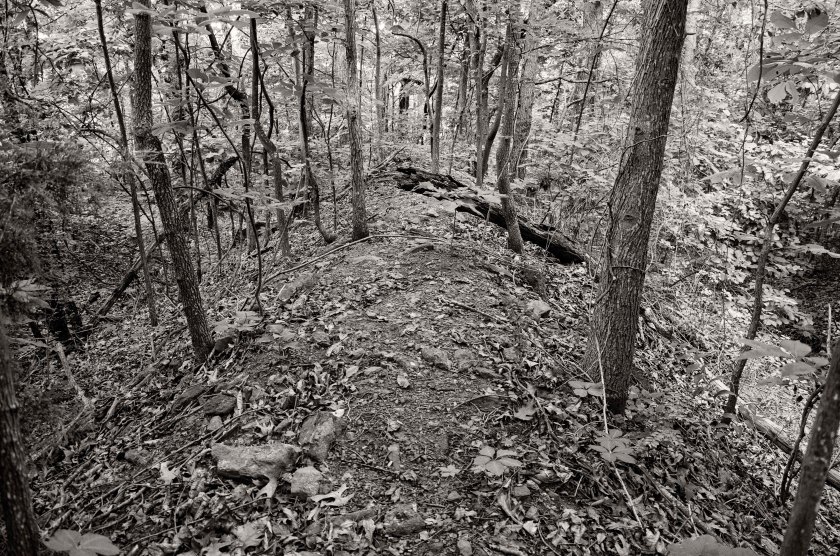
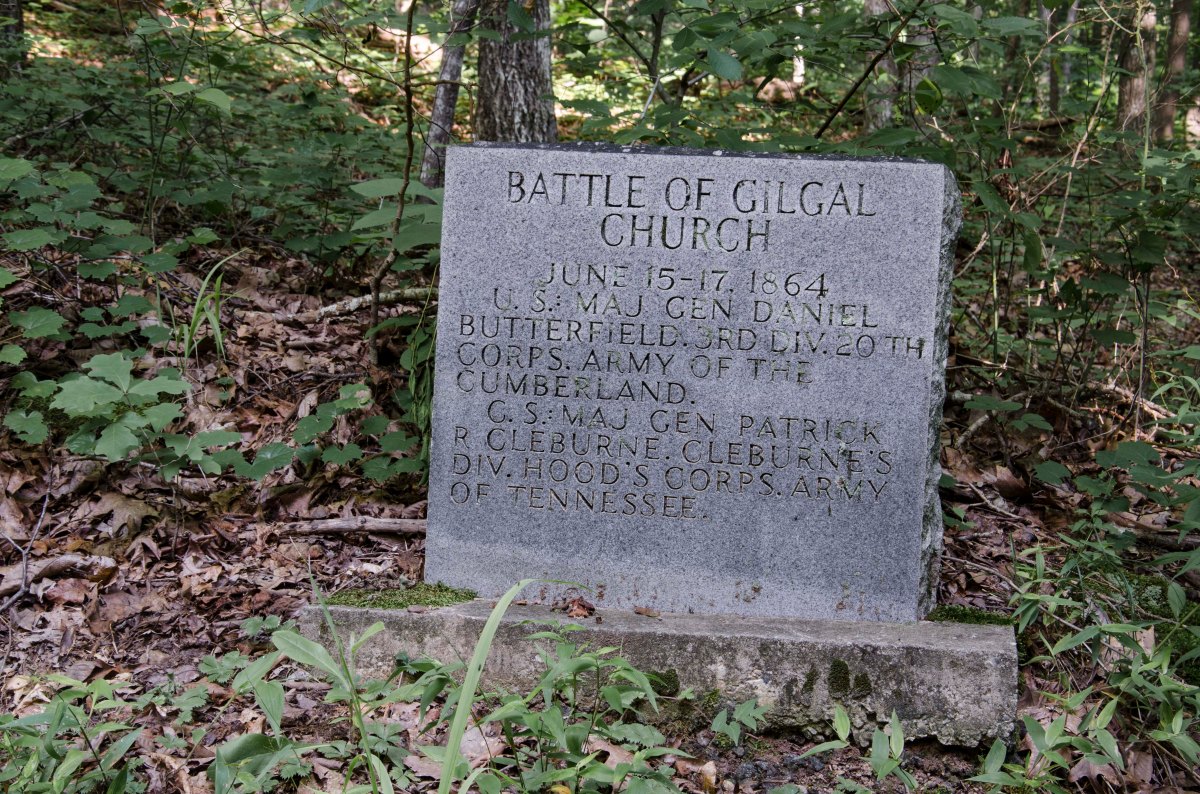
The main Federal assault was carried out by elements of Palmer’s XIV Corps and Howard’s IV Corps.  They were attacking the salient angle that was manned by Cheatham and Cleburne of Hardee’s Corps.  The Confederates were outnumbered, but were behind a strong line of works.  The Federal troops took a beating and at one point on the hill, there was a dead spot.  The Southern soldiers could not fire upon this spot due to the position of their works and the angle of the hill.  The Union troops in this spot began to dig in with their bayonets, tin cups and dinner plates.  They were only about 25 to 30 yards from their objective.  During the night, shovels and picks were brought up to facilitate easier digging and an attempt to tunnel into the hill and under the Confederate works was made.  The plan was to pack it with powder and blow up the works, but the tunnel was abandoned after only making it about half way to the Confederate line.

Federal losses were just over 3,000 and the Confederate losses were about 1000.  This was a tactical defeat for the Federal Army, but Schofield eventually made it to the end of the Confederate line and began moving to flank General Johnston.  This forced Johnston to withdraw from his lines at Kennesaw Mountain and towards the Chattahoochee.  There are many stories of Gallantry, Bravery, and Humanitarian acts during the battle.  The stories and accounts from the diaries of the men who fought and died here make for excellent reading and paint an vivid picture of what happened here.

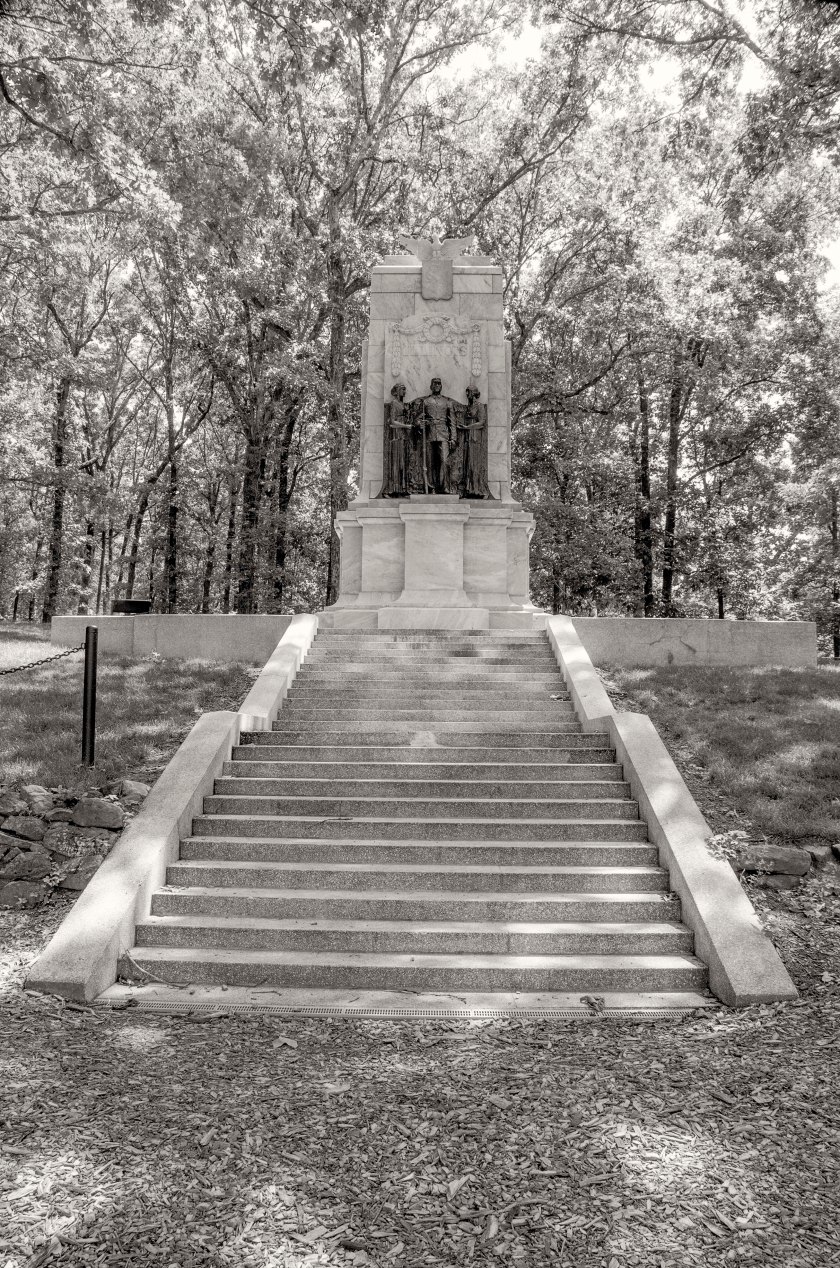
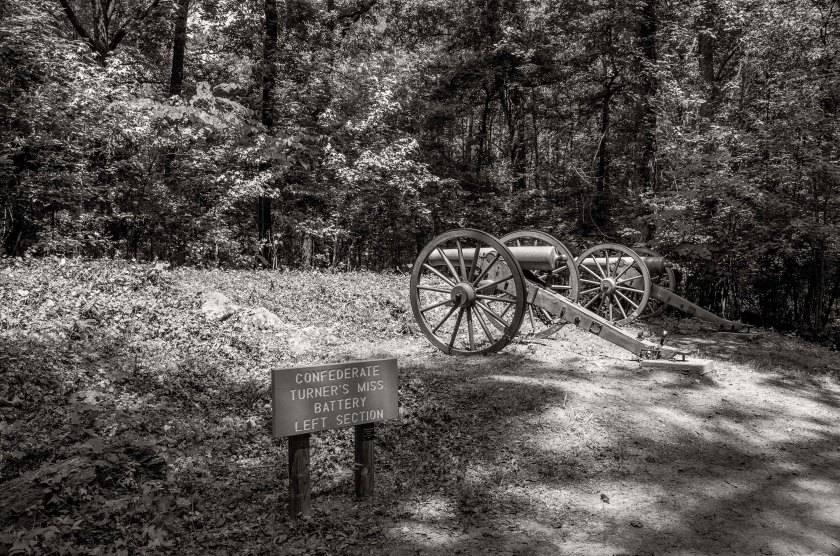
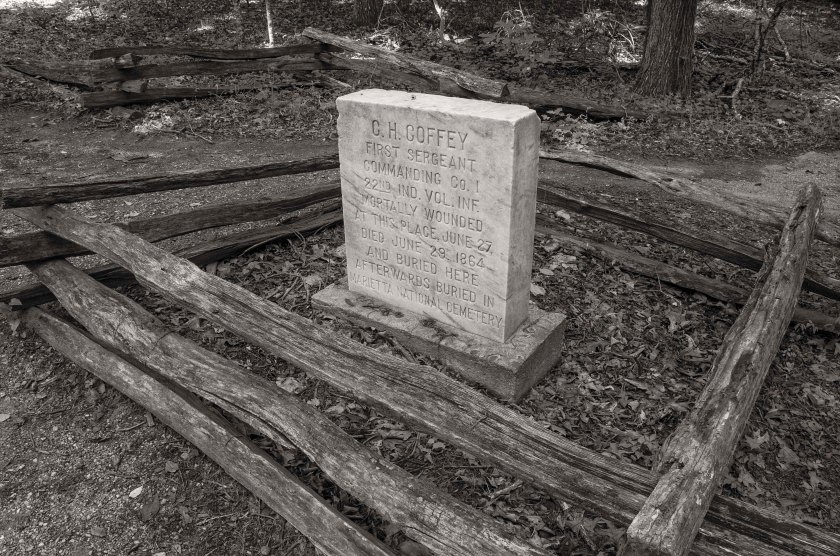
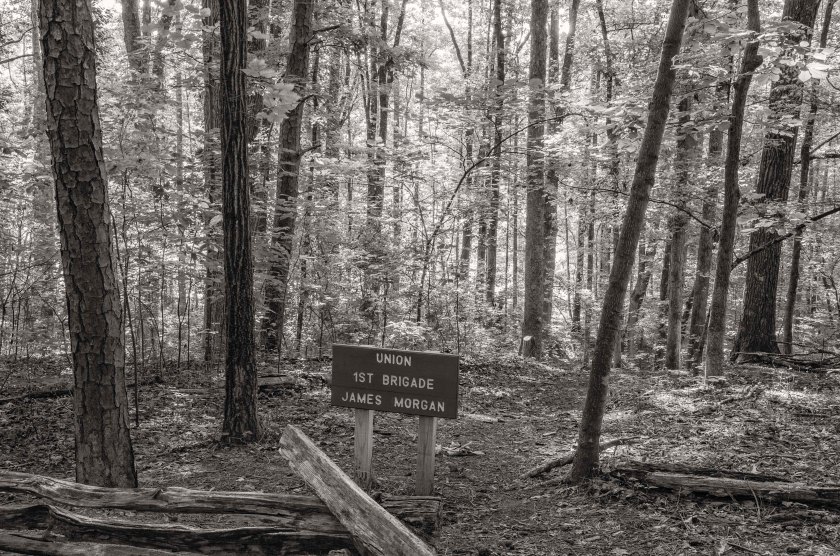
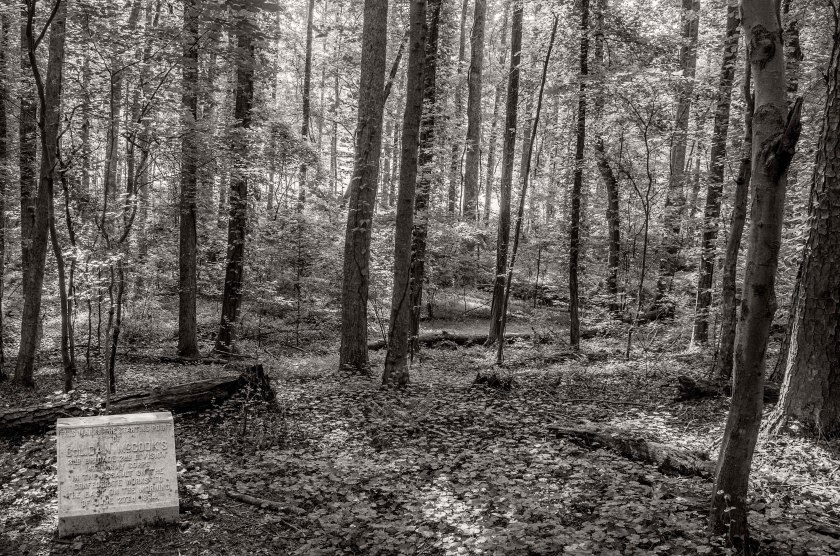
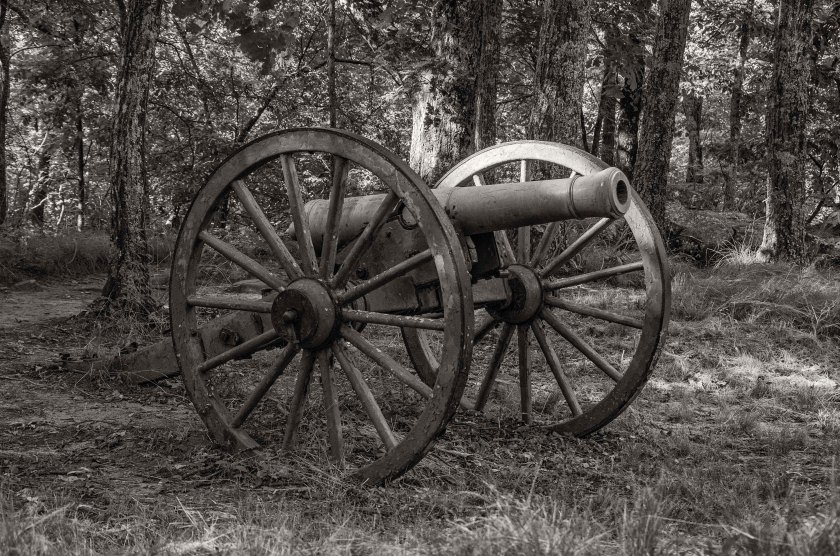
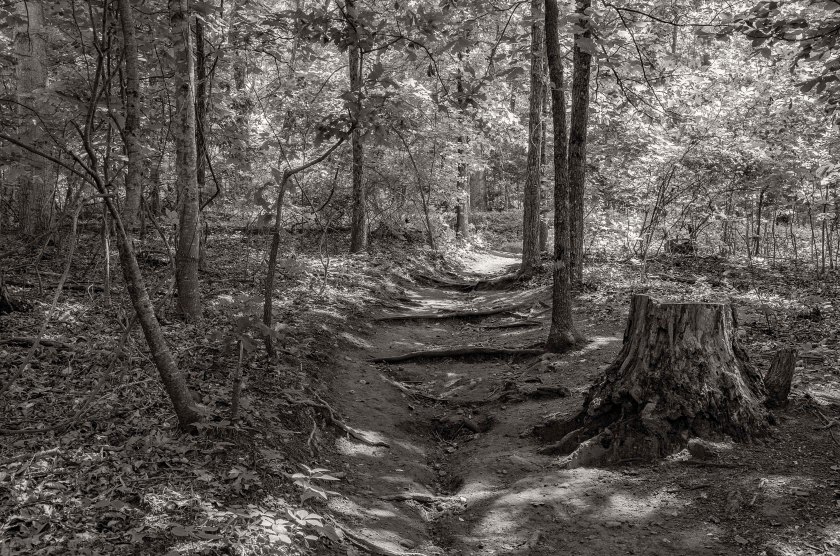
With this battlefield being pretty well preserved I have a significant number of images to share.  This post will contain images from the area of Cheatham’s Hill and tomorrow I will post a few images from Pigeon Hill.

_DSC0038.bw
 Located close to the Confederate lines at Cheatham’s hill are multiple markers for the fallen.
_DSC0044.bw
The Illinois monument placed here by veterans of the battle to honor their fallen comrades. 
_DSC0065.bw
The Left section of Turner’s Battery located along the lines of Cheatham’s Hill.
_DSC0476.bw
Numerous earthworks are located at Cheatham’s Hill, this section is between the parking lot and the Illinois monument. 
_DSC0481.bw
There were many accounts of soldiers being wounded and were left untreated on the field for several days during the battle until a truce was reached so that each side could tend the wounded and bury the dead.  This soldier laid here wounded for two day before he passed.
_DSC0539.bw
Confederate works along Cheatham’s Hill
_DSC0544.bw
Many Federal officers bravely led charges against the Confederate entrenchments, only to fall short mere feet from their goal.
_DSC0280.bw
 Coming from the approach of the Federals as they moved towards the salient in Cheatham’s line called the “Dead Angle” you will see the shallow remnants of hastily dug Federal works.  Morgan was a rear element behind McCook and Mitchell.
_DSC0306.bw
Just past Morgan’s position we find the starting point McCook’s assault on the Dead Angle.
_DSC0327.bw
Federal works of either Kimball’s or Hazen’s Brigade.  They were positioned next to each other with Hazen on the left and Kimball on the right as they attacked the Confederate line a few hundred yards north of the Dead Angle.  They would have been attacking Confederate brigades commanded by Govan, Polk and Granbury.
_DSC0386.bw
McCook, along with Mitchell on his right and Harker on his left attacked straight up to the Dead Angle, now home of the Illinois Monument.  Many a man died on this field.
_DSC0261
June 27th, 2014:  150 years after the Battle of Kennesaw Mountain, a luminary for each lost soul was place on the field of battle before the Illinois Monument to honor sacrifice for their country.
_DSC0215
June 27th, 2014:  Reenactors in a Federal impression move among the luminaries like ghost of the men that died on this very ground.  After speaking with their unit, I was introduced to a direct descendant of soldier under McCook’s command that died on this very field 150 years ago


The Battle of Kolb’s Farm

June 22, 1864:  The Battle of Kolb’s Farm

On orders from General Sherman, General Schofield’s Army of the Ohio, was advancing down the Powder Springs Road in the direction of Marietta.  Schofield was attempting to go around the left end of the Confederate flank.  General Johnston recognized this threat and on the 21st he sent Hood from his right flank to the left in an attempt to neutralize the threat.  In the late afternoon of the 22nd, Hood’s Corps met Schofied’s Army of the Ohio near the Kolb Farm.  Hood initiated an attack without permission from his commander, General Johnston, and he did not bother to do any reconnaissance of the terrain or the force he was engaging.  He unknowingly ordered an advance on a superior enemy force that was entrenched on the high ground.  After suffering about 1000 casualties, Hood retreated and dug in.  He was successful in stopping Schofield from turning the Confederate left flank, but was foolish in making his assault.

_DSC0096.bw
The Kolb Farm House.  Owned by the Park Service, this restored period home is sometimes used as living quarters for park rangers.  It was once a major landmark on the battlefield with its namesake. 
_DSC0161.bw
 Looking west down the Powder Springs Road a period road still in use today.  The Kolb House is across the intersection in the trees.  The Federals and Confederates were positioned in lines that ran roughly North to South on both sides of the road.  The Federals would have been attacking for the distance and moving toward the camera position.  The Confederates would have been moving from the east (behind the camera) toward the Federals in the west.
_DSC0185.bw
Much of the landscape has changed in the last 150 years, but during the Battle of Kolb’s Farm this area would have been part of the Federal line and saw a significant amount of action.
_DSC0214.bw
A subdivision now sits where soldiers once stood.  The Federal lines were on the hillside to the left of the frame.
_DSC0238.bw
Cheatham Hill Road.  The line of battle roughly follows this road and the Confederates attacked across the road from the right side of the frame towards the left.
_DSC0205.bw
The McAdoo House, which sits behind the Kroger in a previous image, is one of the few remaining homes that survived the Battle of Kolb’s Farm and the Battle of Kennesaw Mountain.  It sits atop a low ridge the Federals established their line along during the Battle of Kolb’s Farm.
_DSC0046.bw
 The Cheney House is a period home that survived the Civil War and is now home to apartments for “Senior Living”.  General Schofield made his headquarters here during the Battle of Kolb’s Farm and throughout the remaining operations around Kennesaw Mountain.  He occupied the home June 22 – June 30 and was visited here by General Sherman on the 23rd and the 25th of June. 

June 19th, 1864

June 19th, 1864

The Confederates are entrenched on the Kennesaw Mountain line and have multiple artillery pieces to the top of Little Kennesaw and Big Kennesaw.  It took 100 soldiers to move each cannon up the mountain.  Skirmishing continues all along the line, Federal and Confederate Artillery Batteries begin dueling back and forth.  General Sherman has ordered General Schofield’s Army of The Ohio to move from Lost Mountain, via the Sandtown Road, thus swinging the Federal right over Mud Creek and toward the south western portion of Kennesaw Mountain.  On the evening of the 19th, Schofield reaches Nose’s Creek, about half way between Mud Creek and Kennesaw Mountain.

Video:  Artillery Demonstration at the top of Big Kennesaw Mountain during the 150th anniversary of the Battle of Kennesaw Mountain.

_DSC0392.bw
A cannon now sitting silently atop Big Kennesaw Mountain in the original earthworks.  The park service has protected the artillery pieces and earthworks here with a split rail fence.
_DSC0517.bw
Remnant of the period road that soldiers used to drag the cannons up to the top of Kennesaw Mountain.  It took 100 soldiers to drag each cannon to the top.
_DSC0025.bw
An artillery piece sits atop Little Kennesaw Mountain in what is called “Fort McBride”.
_DSC0051.bw
Earthworks and cannon at Fort McBride, Little Kennesaw Mountain.
_DSC0072.bw
Looking down the barrel of a big gun.  Ft. McBride, Little Kennesaw Mountain.
_DSC0171.bw
Part of Kennesaw Mountains extensive trail system snake behind the parapets and cannons where Confederate soldiers once fought bitterly against the attacking Union Army.

June 18th, 1864

June 18th, 1864

Heavy fighting happened today around the Latimer Farm portion of the Brushy Mountain – Mud Creek Line.  The Marietta Country Club now sits on the former site of the Latimer Farm.  The Confederate lines around the Latimer Farm formed a Salient angle, often called Hardee’s Salient, it was vulnerable to enfilading fire.  Confederate positions were under near constant bombardment from Federal artillery positions no more than 1200 yards away.  Three Federal Divisions, under the command of General Thomas, attacked the three Confederate Brigades at the Salient. The Union troops pushed the Confederate skirmishers back to their main lines and Federal troops soon occupied a trench line in front of the Salient.  Once this line was occupied by the Federal troops, General Johnston realized the chances of the being overrun were high.  On the night of the 18th, he ordered the evacuation of the line and the Confederate line then moved back to the famous Kennesaw Mountain Line.

_DSC0195.bw
 Remnants of Confederate earthworks that were used during the Battle of Latimer’s Farm.  Now located within the Barrett’s Green Subdivision, they were preserved in the local SCV Camp McDonald in conjunction with the builder.  This area was under a near constant artillery bombardment.
_DSC0421.bw
While hard to discern due to the undergrowth, this images shows a line of several Federal artillery positions.  The are called Lunettes.  It is rare to have some so well preserved and these have been protected on private property.  The property is now being developed into a subdivision and the Lunettes are being protected through the work of the local SCV Camp McDonald and the developer.
_DSC0435.bw
Remnants of Federal earthworks located on the same property as the Lunettes above. 
_DSC0507.bw
Efforts by the local SCV Camp McDonald and the developer to prevent the destruction of the remaining earthworks.
_DSC0078.bw
This shallow depression is all that remains of this section of Confederate earthworks in the area of Hardee’s Salient.  They are located on private property that has been farmed for sometime.
_DSC0115.bw
The small collection of minie balls found on the property of a farmer who owns the property where the previous image was taken.  He grew up on the family farm and still lives there today and as a teenager he claimed to have found a 55 gallon drums worth of minie balls in the fields which he sold to collectors.  Look close and you may see one with teeth marks…
_DSC0129.bw
 Now covered with trees and thick underbrush, these remnants of Confederate earthworks, that were part of Hardee’s Salient, now sit quietly behind a local church.

June 17th, 1864

June 17th, 1864,

Heavy skirmishing continued along the Lost Mountain, Mud Creek, Brushy Mountain Line.  Heavy engagements happened in the area of Latimer’s Farm, now the Marietta Country Club.  Calvary actions were also happening continuously on both flanks.  General Johnston begins planning to move to his next defensive position at Kennesaw Mountain.  General Sherman, who has become frustrated, begins to contemplate a direct assault on the Confederate lines as opposed to a flanking movement.

_DSC0239.bw
 Looking south east along Hwy 120 where it crosses Mud Creek.  The Confederates dug in atop the low rise in the distance in an attempt to stall the Federal advance as it crossed Mud Creek.  Many, if not all, of the earthworks are now gone and are covered my subdivisions and shopping centers.
_DSC0007.bw
Confederate earthworks at the far left (west end) of the Brushy Mountain Lost Mountain line.  These works were manned by Jackson’s Calvary.  These works were preserved by the local SCV Camp McDonald in conjunction with the Subdivisions builder and HOA.  They are now preserved as a small park for the subdivision. 
_DSC0026.bw
 Earthworks on the extreme right (East side) of the Brushy Mountain Lost Mountain line.  These works are located on Brushy Mountain in a small subdivision.  They are protected as a small park with historical information signs.
_DSC0264.bw
“Hoods Fort” on Brushy Mountain stands a large earthwork fortification along with several thousand feet of preserved trenches.  The exact purpose of the large fortification is unknown, but many speculate it was used as a ammunition bunker.  You can get a sense of the scale from this image as you can look down the slope to the base of the fortification. 
_DSC0394.bw
 A section of trenches curves its way around the base of the site known as “Hood’s Fort”

June 16th, 1864

June 16th, 1864:

After the fighting at Gilgal Church on the 15th and continued fighting on the 16th, the Union Army has figured out that lines in the area form a salient and begin to pour in enfilading fire on the Confederates.  Other Union forces move against the thin line of southern soldiers west of Gilgal Church towards Lost Mountain.  Schofield’s XXIII Corps is now in a position to turn Johnston’s left flank, Schofield may or may not realize that he is in such an advantageous position, but Johnston does and orders Hardee’s Corp to pull back at dark, to the far side of Mud Creek and establish a new line.  During this retrograde movement, a Union artillery shell explodes near Brigadier General Lucius Polk.  He is the nephew of Lt. Gen. Leonidas Polk and only two days after the death of his Uncle, Lucius Polk is wounded and loses his leg.

_DSC0004.bw
Recreation of what Confederate earthworks may have looked like.
_DSC0080.bw
 Remnants of Confederate earthworks at the site of the Battle of Gilgal Church.

150 Years Ago Today: Late September

Late September 1864:
     Sherman has fortified Atlanta extensively and has started to build up supplies and rest his troops.  The Confederates are not sitting idle, and Hood has ordered all the Federal prisoners kept at Andersonville to be moved to different prisons out of the reach of Sherman’s forces.  Hood then shifts his Army from Love Joy’s Station to Palmetto, which lies along the railroad to West Point and further into Alabama.  Hood is resting his troops, building up supplies and making plans for a move to the north to attack Sherman’s supply line.
     Confederate President Davis arrives in Palmetto on September 25th.  The next morning he begins a review of the troops and is greeted with silence, not cheers for their President.  A few soldiers yell out to the President asking for General Johnston to be place back in command, but these remarks fall upon deaf ears.  Bringing Johnston back would be like admitting the he made a mistake in removing him.
     On the 27th, Davis meets will Hood and all his Corps Commanders and some of the Divisional Commanders.  A great deal is discussed including a plan to strike Sherman’s supply and communications lines north of Atlanta, there by cutting him off and forcing him to retreat back to Tennessee, all the while being engaged by Hood.  Hood then thinks he can move on the Federals in Tennessee and turn the tide of the war in the western theater and possibly as a whole.  Hood also complains to Davis about General Hardee and blames the loss at Jonesboro on him.  He ask Davis to remove him.  Davis agrees and Hardee readily accepts the offer to command the coastal defenses of Georgia, South Carolina, and Florida.  Hardee is relieved to out from under Hood’s command.  On the 28th, Hood receives word from Davis that he may move forward with his plans to on North.
     On September 29th and 30th, the Confederate Army of Tennessee begins their next march and cross the Chattahoochee River near Palmetto and Campbellton about 40,000 troops.  By late in the evening of October 1st, Hoods army has moved about 8 miles from the river crossing in the direction of Marietta.  Sherman, who had anticipated this move to the north by Hood a week earlier, had already sent troops to Rome and to Chattanooga to help protect those areas from the threat of Hood and from the threat of General Nathan Bedford Forrest cavalry that has started operating in the northern part of Alabama and into Tennessee.

More Battle of Atlanta Images

I have added some more images to the gallery for the 2014 Battle of Atlanta.  I added 18 new images to the Battle gallery and then added images the camps to another gallery. 

Here is the link again:  Battle of Atlanta 2014 Images

Here are a few of the images from the camps.

150 Years Ago Today: September of 1864

     After the Battle of Jonesboro, Sherman’s Army followed the Confederates to Love Joy’s Station, where Hood rejoined Hardee with Stewart’s and Lee’s Corps.  Sherman skirmished a day or so and then after learning that the XX Corps had entered Atlanta, he withdrew from Love Joy’s Station and marched back to Atlanta to claim his prize and losing what many consider to have been a prime opportunity to crush Hood and the Army of Tennessee once and for all.  Having taken Atlanta, Sherman decided he had reached his objective and did not think it was worth the bloodshed to continue pressing his advantage. 
     Upon entering Atlanta, Sherman established his headquarters and began to restore order to the town.  He decided that it was a military outpost and ordered all civilians to evacuate.  A truce was negotiated with Hood, who was not happy about civilians being forced from their homes, and the civilians were given a choice of taking a train north or one to the south.  The ones that choose a train south, were sent to Rough and Ready, where they had to disembark and travel to Love Joy’s Station by wagon.  About half the cities population went north and the other half went south.  There were some civilians that were allowed to stay as they were given jobs by the Federals. 
     Poe, Sherman’s Chief Engineer, immediately started to rebuild and strengthen the defensive line around the city.  He built artillery forts connected with infantry trenches.  With much of the city in ruin, the soldiers started to use building materials from destroyed structures to begin building small shacks as living quarters.  Sherman also began to rest and resupply his armies in preparation for his next sortie into the heart of the Confederacy.
     Many of the period images that exist of Atlanta come from this time of the campaign.  George Barnard entered the city to document the Federal occupation.  There are many iconic images of the Federals and their forts in Atlanta.

150 Years Ago Today: Sept. 2nd, 1864 Atlanta Has Fallen

Sept. 2nd, 1864:
     With the Confederate army gone and ensuing occupation of the Federal Army, Mayor Calhoun and a group of prominent citizens rode out of the city under a white flag of truce.  Prior to leaving they debated as to whether or not they should arm themselves, the decide wisely to go unarmed.  They ride out the Mason-Turner Ferry Road, now called Donald Lee Hollowell Parkway, where they pass through the defensive perimeter and go by the Ponder house.  They encounter a mounted patrol of Federals whom they engage in conversation.  Calhoun informs the Colonel that he would like to surrender the city to General Sherman, the Colonel states that Sherman is at Jonesboro and has Calhoun write a note to his commanding officer General Ward, surrendering the city.  Calhoun wrote the note and the Colonel and two other officers sign it affirming its validity.  The not reads as follows:
     Brigadier General Ward,
          Comdg. Third Division, Twentieth Corps

     Sir:  The fortune of war has placed Atlanta in your hands.  As mayor of the city I ask protection to non-combatants and private property.
           
                                                                   James M. Calhoun,
                                                                   Mayor of Atlanta

By noon Federal units have reached City Hall and hoisted their colors over the city.  Around 2:00pm, General Slocum enters the city and establishes his headquarters at the Trout House.  He sends a telegram to the Secretary of War in Washington.  The first line is “General Sherman has taken Atlanta”. 
     Demoralized, Hood’s troops continue their march to Love Joy’s Station to link up with Hardee.  The loss of Atlanta is a crushing blow to the Confederacy.  For Lincoln, it is a great political achievement that helps secure his spot for another term as President.