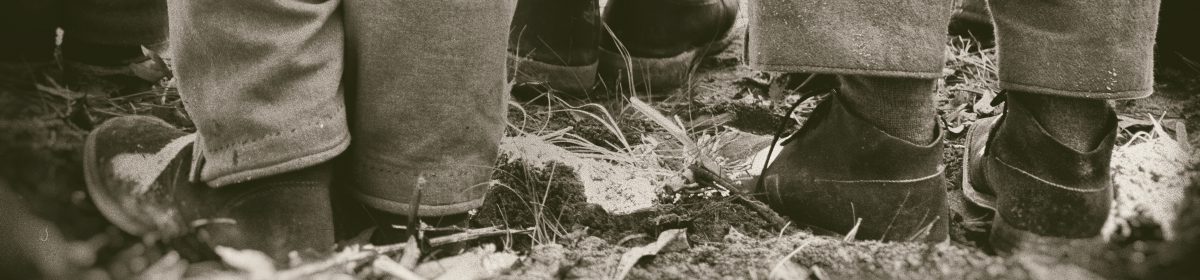
The Federal troops continue to chase the Confederates and soon, as they approached Smyrna, they begin to encounter resistance from Confederate Skirmishers. They were pushed back to their main lines and the Federals began to entrench. Elements of Howard’s and Palmer’s Corps of the Army of the Cumberland advanced on the portion of the Confederate Smyrna Line near Smyrna Camp Ground, roughly the center of the Confederate line. They were engaging seasoned troops of Cleburne’s Division and suffered heavy losses. The second portion of the attack was made by Dodge’s Corps of the Army of the Ohio, they attacked the Confederate Left near Ruff’s Mill. There was a salient in the Confederate line near this point that was their target. This is where Hood’s and Hardee’s Corps met. Elements of Dodge’s Corps pushed the skirmishers of Stevenson’s Division out of their rifle pits and back to their main works, but suffered heavy losses during the assault. These attacks gained no ground for the Federals and only confirmed that the Confederate army was still in the line enforce.
The main Federal advantage gained this day, was Blair’s Corps being able to work its way around and behind the Confederate left flank. At that point they were closer to Atlanta than the main body of the Confederate Army. Blair’s movement seriously threatened Johnston and in the late night hours of July 4th and early morning hours of July 5th, Johnston fell back from the Smyrna Line to the last line of defense west of the Chattahoochee River, known at Johnston’s River Line.
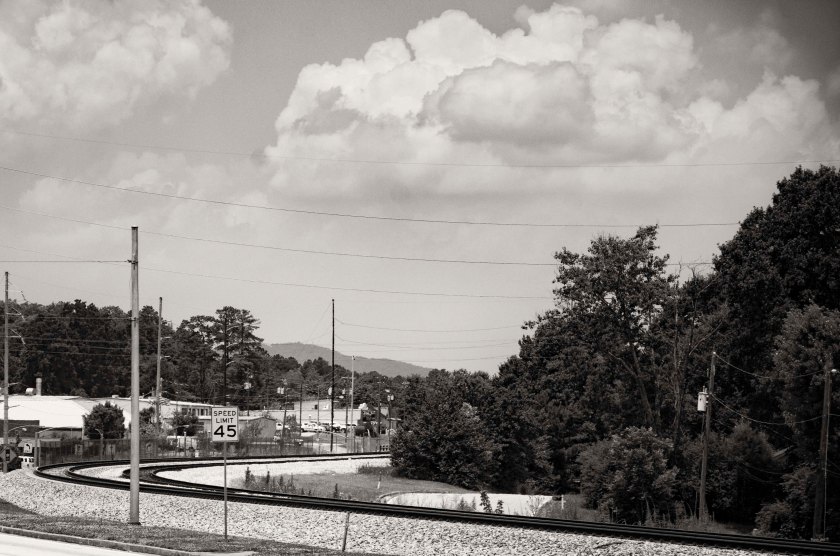
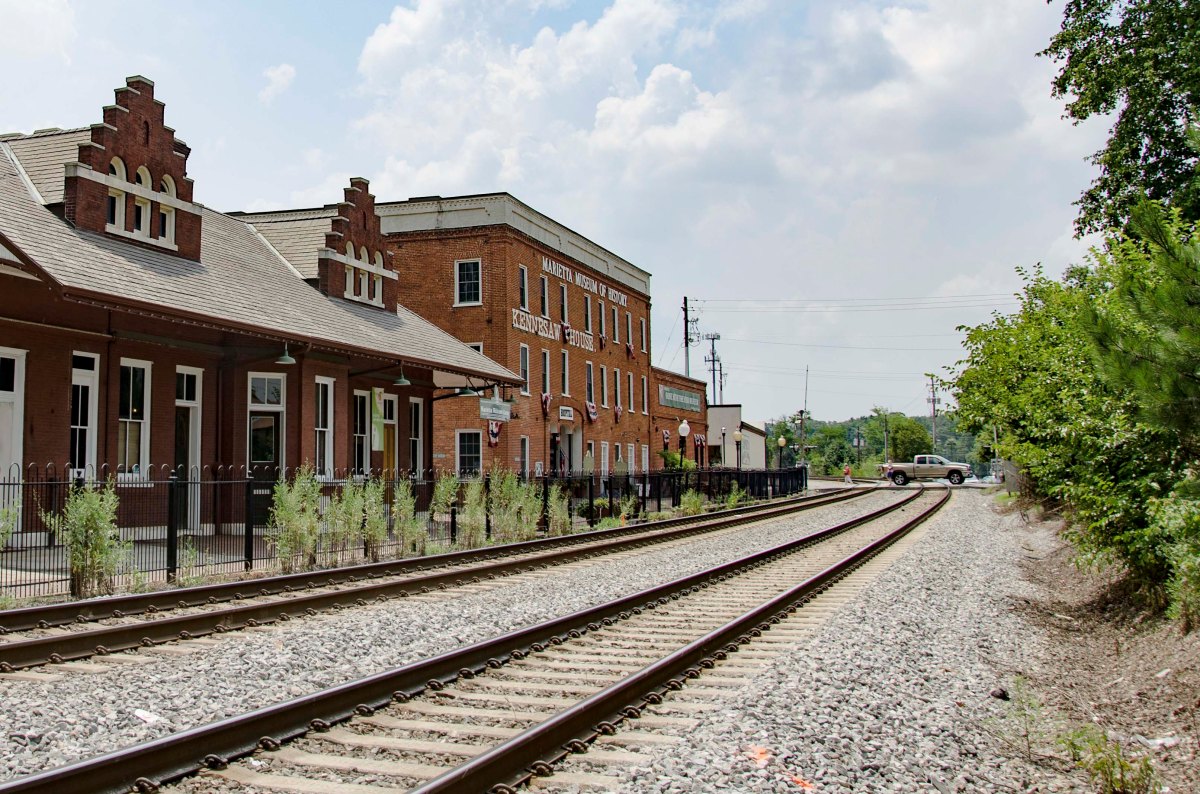
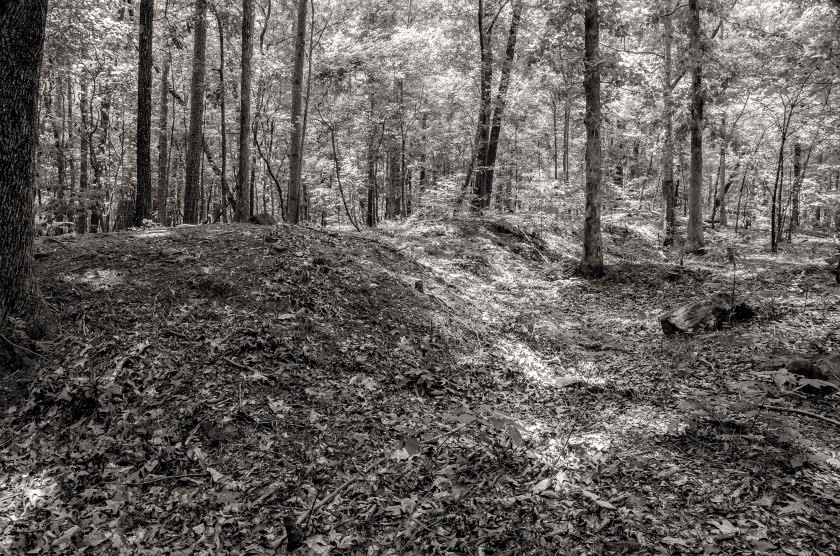
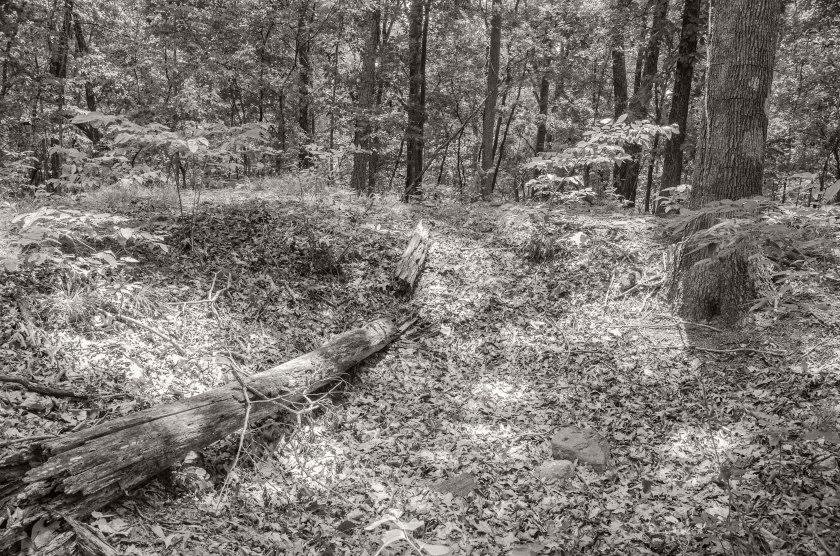
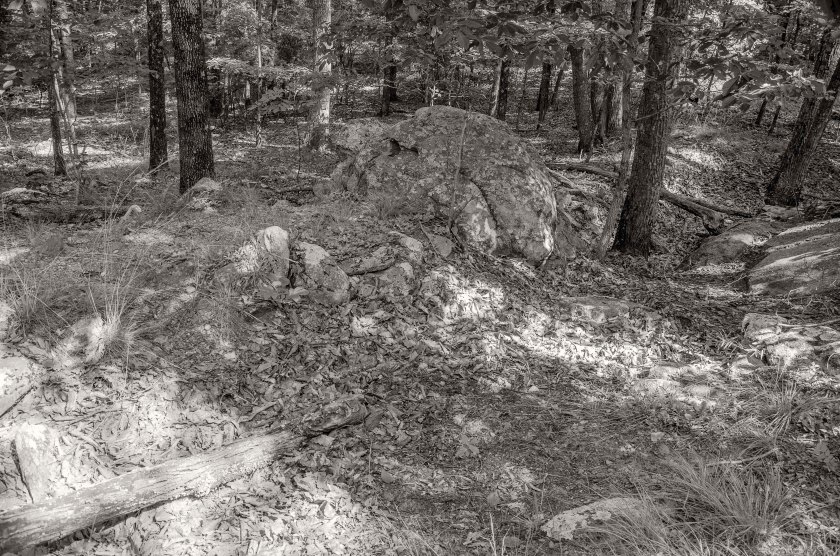
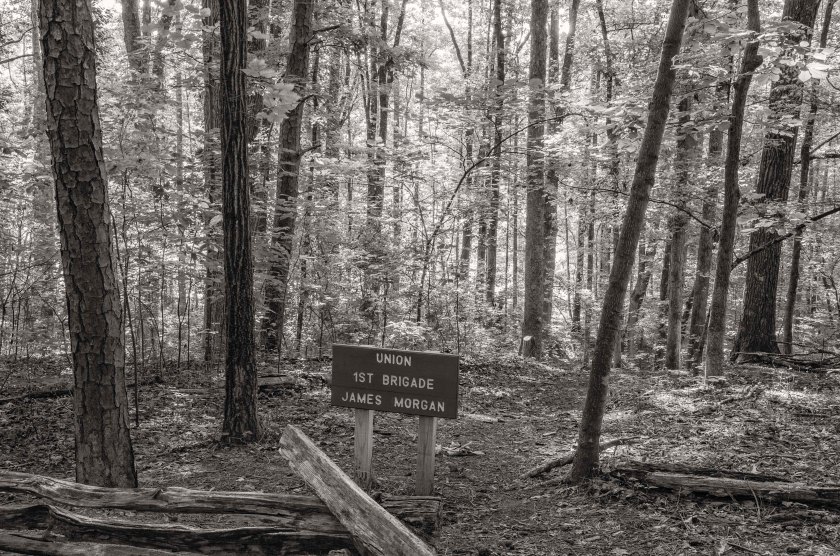
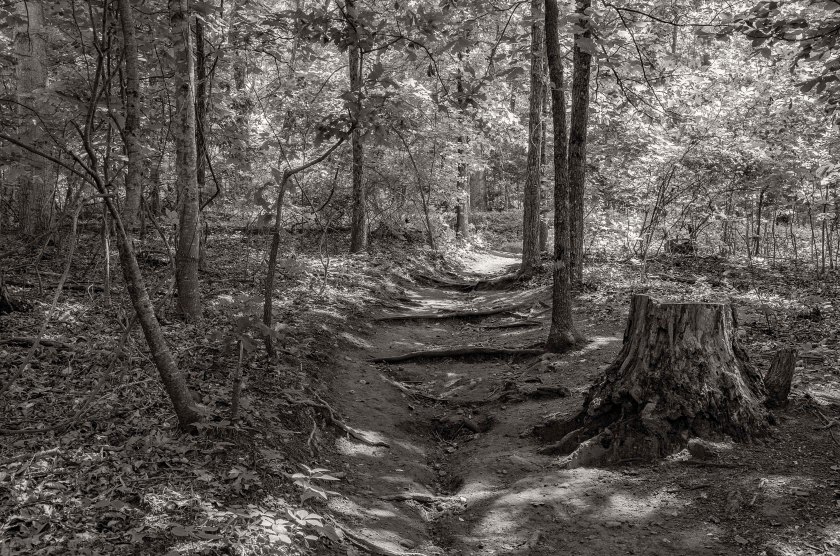
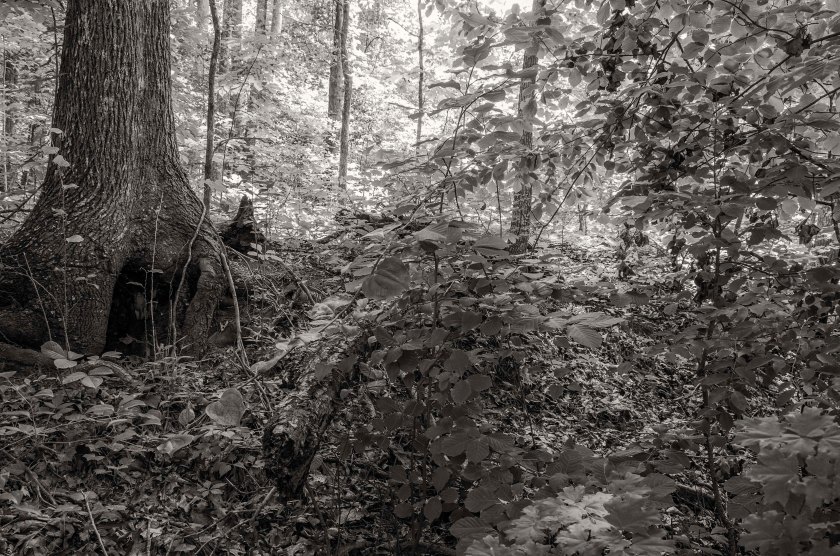
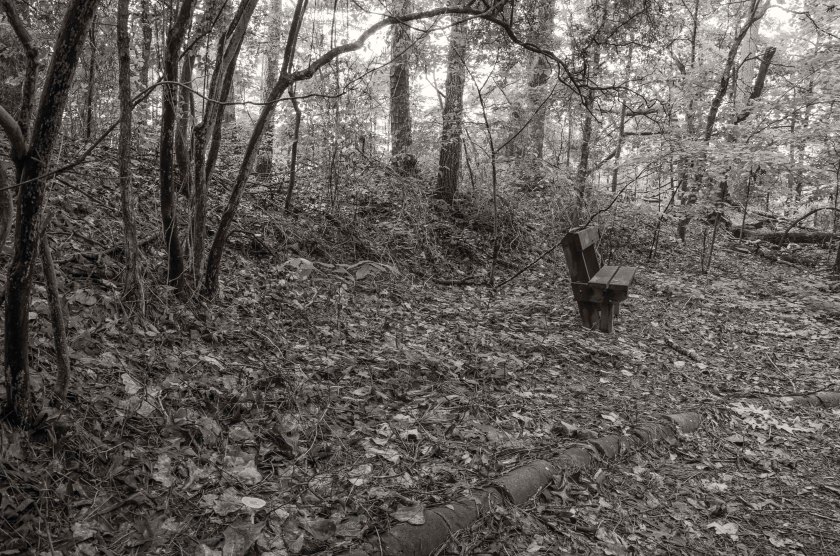
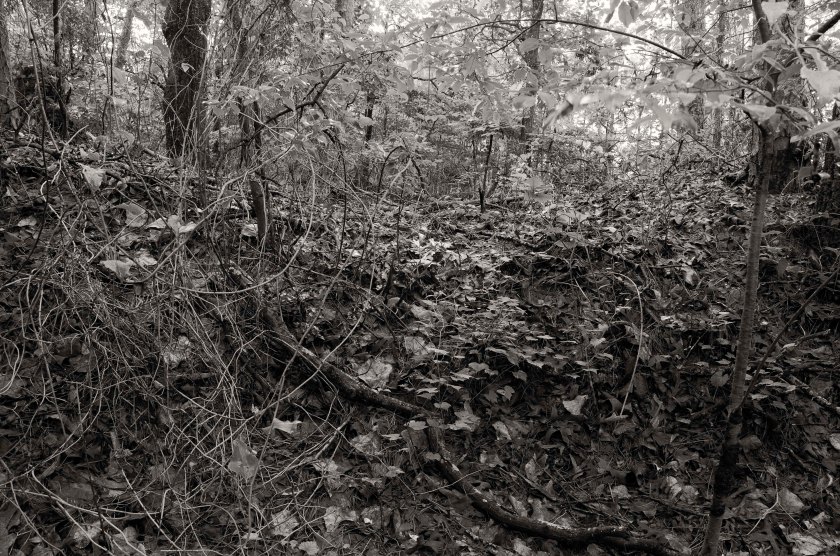
The Smyrna Market Village now occupies the former location of the Smyrna Camp Ground, which was used as a meeting site for the Methodist Church as well as other denominations.Looking north west at the recreation of an old train depot. The railroad tracks are just out of frame to the right and the Confederate line crossed the tracks in this general area. Smyrna Campground would have been to the left just out of the frame.Looking south along the railroad tracks that head into Atlanta. Notice the reconstructed depot to the right. The Confederate lines crossed the tracks in this general area. Looking north west from Smyrna up the railroad tracks that travel out of Marietta. Notice Kennesaw Mountain in the distance approximately five miles away.Looking from the Confederate line towards Kennesaw Mountain approximately 5 miles away. The Confederate line at Smyrna followed the low ridge line that the current Concord road follows and then takes a turn to form a salient angle that followed high ground along what is now N. Cooper Lake Road.Concord Road, the Confederate line followed this high ground. This is all that remains of Ruff’s Mill. Now on private property, this brick structure dating back before the civil war was spared by the Federal Troops as it was a grist mill they could use for food production.The Concord Covered Bridge was destroyed by the Federal troops on July 4th, 1864. It was rebuilt in the late 1870’s. The stacked stone pier in the middle of the bridge is all that remains of the original structure.
General Sherman entered Marietta and established his headquarters in the Kennesaw House and ordered his forces to continue the pursuit of the Confederates and attempt to engage them no matter what the cost of men and material. They must press their advantage while the Confederates are retreating.
The Kennesaw House saw many uses during the war. Early in the war, Andrews and a few of conspirators, stayed here the night before they stole a train attempted to destroy the railroad that was supplying the Confederate Army. It was also used as a hospital at one point as well as a Sherman’s Headquarters. Now it is a museum well worth the visit.
During the attack on Kennesaw Mountain the Federals set an artillery battery containing 24 guns in total. It was located on a low rise near the base of Big Kennesaw Mountain. These images are from the 24 gun battery which is protected by the National Park.
Just in side the tree line of this low rise near the base of Kennesaw Mountain is the Federal 24 gun battery.Remnants of one of the parapet walls at the 24 gun battery.The gun notch is still slightly visible in the remnants of this parapet wall.A view looking down the line of earthworks for the 24 gun battery. Four separate emplacements are visible along this line.Looking from the rear of the emplacement in the direction the gun would have faced.
With so many locations in connection with the battlefield at Kennesaw Mountain, I am going to make several more post over the next few days with more images. There were just too many to include in yesterdays post. Today’s images will focus on Pigeon Hill.
On the morning of June 27th, Federals under the command of General McPherson attacked the Confederate line in the area of Pigeon Hill and Little Kennesaw north east of Cheatham’s Hill. The Federals quickly overran some Confederate pickets and rifle pits located ahead of the main line, but were quickly stalled by the well entrenched Confederates of French’s Division, which held Little Kennesaw and Pigeon Hill. The Confederates well entrenched with plenty of large boulders and rocks used as cover in their earthworks. At one point the Confederates were even rolling boulders and large down on the attacking Federals. French’s Division also held the advantage of the higher ground thus forcing the Federals to attack up steep inclines that had been heavily covered with entanglements by the men of French’s Division. The attacking Federals were repulsed and forced to retreat to low valley between Little Kennesaw and Pigeon Hill where they were trapped by musket and cannon fire for hours. They were finally able to retreat back to their lines after darkness fell upon the battlefield.
A monument to fallen Federals stands in a field near starting point of the Federal assault on Pigeon Hill. The hiking trail up to Pigeon Hill and Little Kennesaw follows the route that Federal soldiers took during the attack. Look to where the trail appears to end(but really turns left). You will the what are the remains of Confederate earthworks just as the attacking Federals would have seen.Remnants of Confederate Earthworks on Pigeon Hill. These are some of the first entrenchments that were encountered by the Federal assault.Remains of Confederate earthworks on Pigeon Hill near the spot where George Barnard made an image of the battlefield in the fall of 1864.A line of Confederate works on top of Pigeon Hill near the lower portion of Little Kennesaw. Notice the large boulders further down the line and the slope as goes do to the right where the Federals were trapped until nightfall.More Confederate works with large boulders included into the line.Looking down the slope the Federals tried to make an attack from. During the battle the Federals were forced to retreat further down this small valley until the could make it back to their lines under the cover of darkness.This is a period image captured by photographer George Barnard in the early fall of 1864 as he traveled to Atlanta to photograph the campaign.Here is the same location photographed by George Barnard only 150 years later. Notice the large oddly shaped stone in the foreground of each image.
The battle of Kennesaw Mountain was really an extended operation that lasted for several days before and after the 27th. Troops were under small arms and cannon fire daily, the 27th was day of the main Federal Assault at Cheatham’s Hill, also known as the Dead Angle, as well as the area of Pigeon Hill and the remainder of the Federal left. After days of a stalemate, General Sherman was frustrated and ordered a frontal assault on the Confederate Lines. The attack was to begin at 8:00am on the 27th, but was delayed for nearly an hour. Their goal was to break the Confederate line at what they thought was the weakest point. They chose Cheatham’s Hill due the salient in the line. General Sherman ordered General McPherson to use his Army of the Tennessee to attack the right of the Confederate line as a diversion to the main assault. McPherson’s diversionary attack was carried out against Big Kennesaw, Little Kennesaw, and Pigeon Hill. General Schofield, who was still positioned astride the Powder Springs Road near Kolb’s Farm, was ordered to keep extending the Federal right flank in an attempt to reach the end of the Confederate lines and turn their flank. General Thomas and his Army of the Cumberland were positioned in the center of the Federal lines.
The main Federal assault was carried out by elements of Palmer’s XIV Corps and Howard’s IV Corps. They were attacking the salient angle that was manned by Cheatham and Cleburne of Hardee’s Corps. The Confederates were outnumbered, but were behind a strong line of works. The Federal troops took a beating and at one point on the hill, there was a dead spot. The Southern soldiers could not fire upon this spot due to the position of their works and the angle of the hill. The Union troops in this spot began to dig in with their bayonets, tin cups and dinner plates. They were only about 25 to 30 yards from their objective. During the night, shovels and picks were brought up to facilitate easier digging and an attempt to tunnel into the hill and under the Confederate works was made. The plan was to pack it with powder and blow up the works, but the tunnel was abandoned after only making it about half way to the Confederate line.
Federal losses were just over 3,000 and the Confederate losses were about 1000. This was a tactical defeat for the Federal Army, but Schofield eventually made it to the end of the Confederate line and began moving to flank General Johnston. This forced Johnston to withdraw from his lines at Kennesaw Mountain and towards the Chattahoochee. There are many stories of Gallantry, Bravery, and Humanitarian acts during the battle. The stories and accounts from the diaries of the men who fought and died here make for excellent reading and paint an vivid picture of what happened here.
With this battlefield being pretty well preserved I have a significant number of images to share. This post will contain images from the area of Cheatham’s Hill and tomorrow I will post a few images from Pigeon Hill.
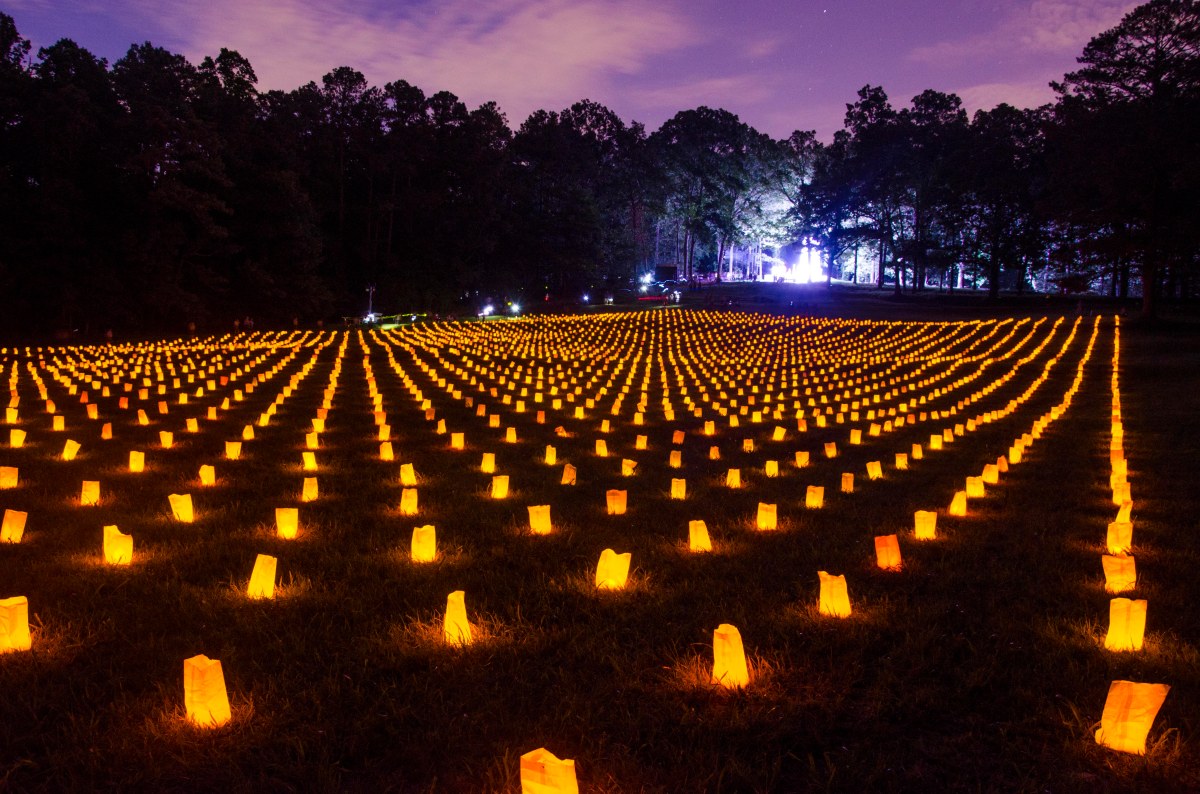
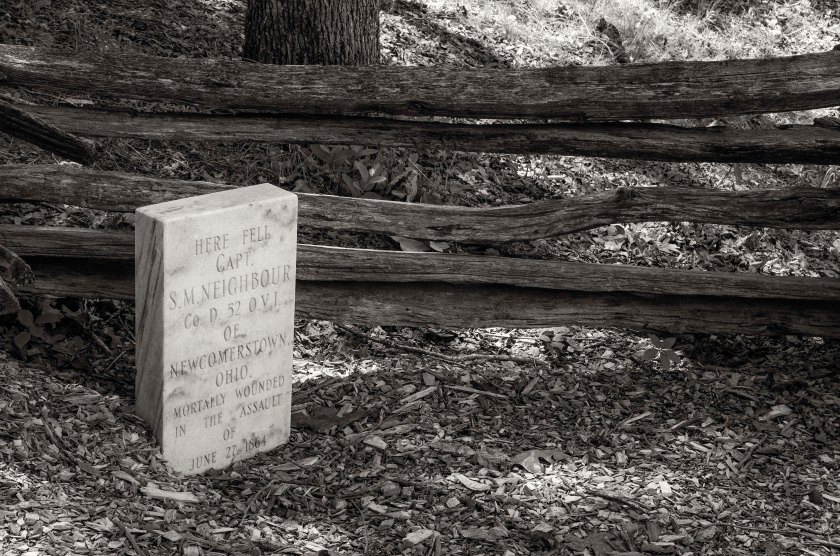
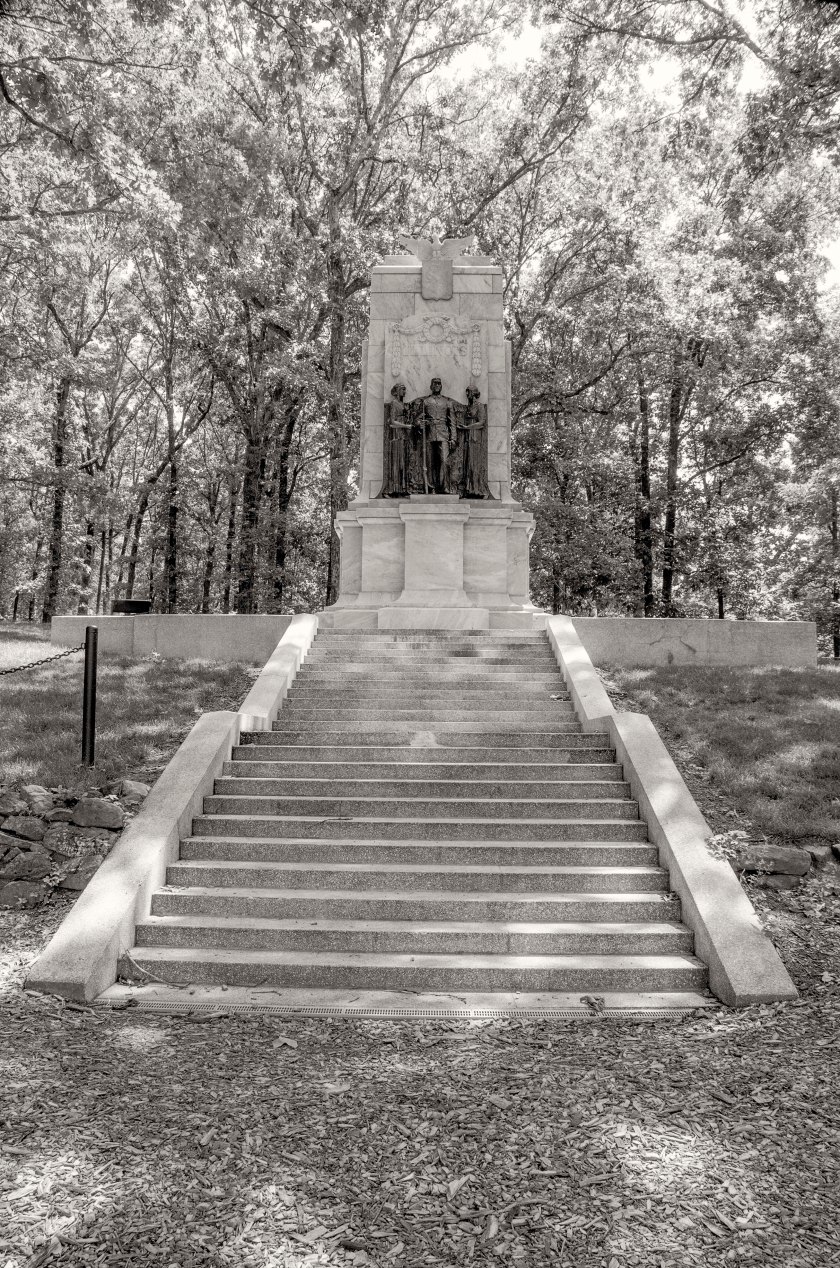
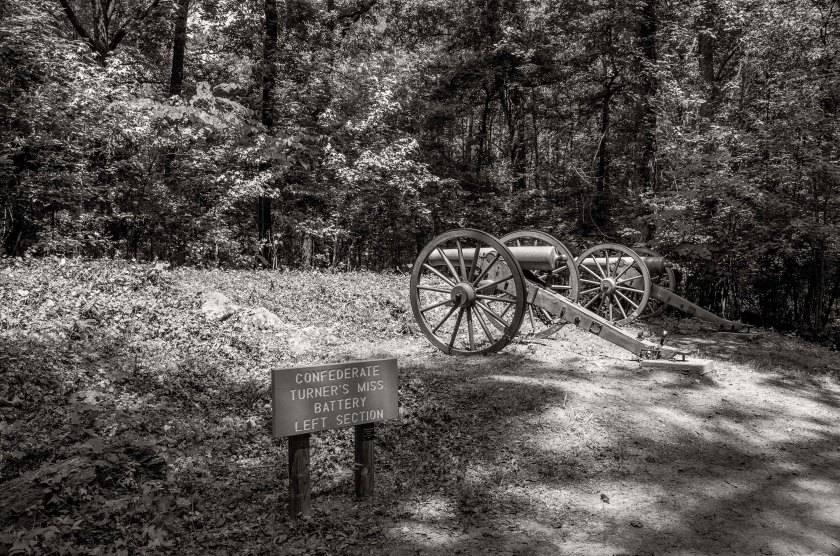
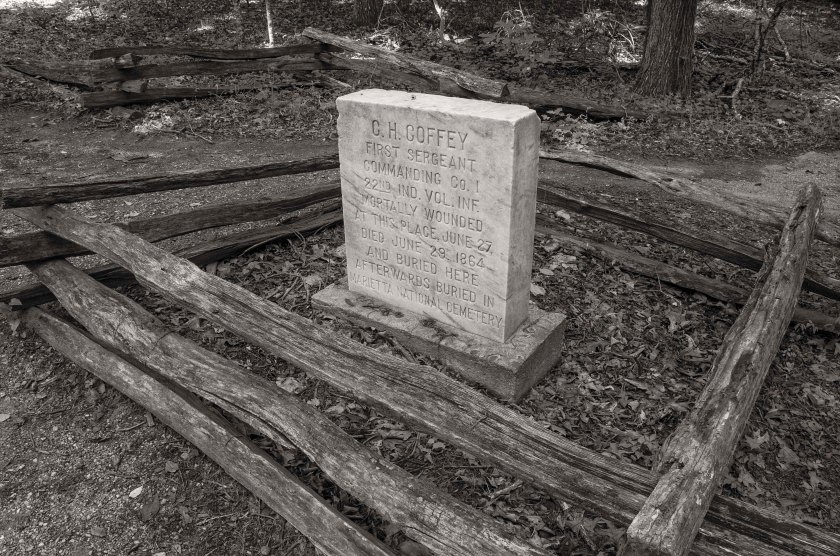
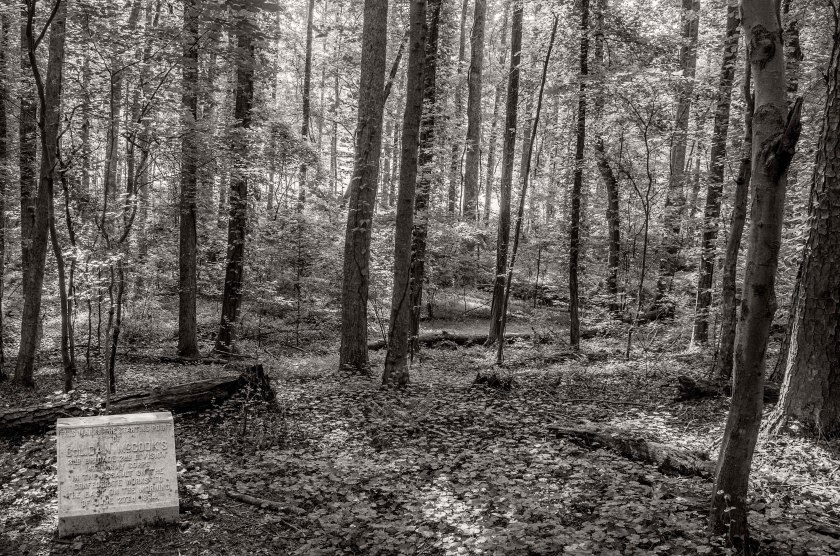
Located close to the Confederate lines at Cheatham’s hill are multiple markers for the fallen.The Illinois monument placed here by veterans of the battle to honor their fallen comrades. The Left section of Turner’s Battery located along the lines of Cheatham’s Hill.Numerous earthworks are located at Cheatham’s Hill, this section is between the parking lot and the Illinois monument. There were many accounts of soldiers being wounded and were left untreated on the field for several days during the battle until a truce was reached so that each side could tend the wounded and bury the dead. This soldier laid here wounded for two day before he passed.Confederate works along Cheatham’s HillMany Federal officers bravely led charges against the Confederate entrenchments, only to fall short mere feet from their goal. Coming from the approach of the Federals as they moved towards the salient in Cheatham’s line called the “Dead Angle” you will see the shallow remnants of hastily dug Federal works. Morgan was a rear element behind McCook and Mitchell.Just past Morgan’s position we find the starting point McCook’s assault on the Dead Angle.Federal works of either Kimball’s or Hazen’s Brigade. They were positioned next to each other with Hazen on the left and Kimball on the right as they attacked the Confederate line a few hundred yards north of the Dead Angle. They would have been attacking Confederate brigades commanded by Govan, Polk and Granbury.McCook, along with Mitchell on his right and Harker on his left attacked straight up to the Dead Angle, now home of the Illinois Monument. Many a man died on this field.June 27th, 2014: 150 years after the Battle of Kennesaw Mountain, a luminary for each lost soul was place on the field of battle before the Illinois Monument to honor sacrifice for their country.June 27th, 2014: Reenactors in a Federal impression move among the luminaries like ghost of the men that died on this very ground. After speaking with their unit, I was introduced to a direct descendant of soldier under McCook’s command that died on this very field 150 years ago
On orders from General Sherman, General Schofield’s Army of the Ohio, was advancing down the Powder Springs Road in the direction of Marietta. Schofield was attempting to go around the left end of the Confederate flank. General Johnston recognized this threat and on the 21st he sent Hood from his right flank to the left in an attempt to neutralize the threat. In the late afternoon of the 22nd, Hood’s Corps met Schofied’s Army of the Ohio near the Kolb Farm. Hood initiated an attack without permission from his commander, General Johnston, and he did not bother to do any reconnaissance of the terrain or the force he was engaging. He unknowingly ordered an advance on a superior enemy force that was entrenched on the high ground. After suffering about 1000 casualties, Hood retreated and dug in. He was successful in stopping Schofield from turning the Confederate left flank, but was foolish in making his assault.
The Kolb Farm House. Owned by the Park Service, this restored period home is sometimes used as living quarters for park rangers. It was once a major landmark on the battlefield with its namesake. Looking west down the Powder Springs Road a period road still in use today. The Kolb House is across the intersection in the trees. The Federals and Confederates were positioned in lines that ran roughly North to South on both sides of the road. The Federals would have been attacking for the distance and moving toward the camera position. The Confederates would have been moving from the east (behind the camera) toward the Federals in the west.Much of the landscape has changed in the last 150 years, but during the Battle of Kolb’s Farm this area would have been part of the Federal line and saw a significant amount of action.A subdivision now sits where soldiers once stood. The Federal lines were on the hillside to the left of the frame.Cheatham Hill Road. The line of battle roughly follows this road and the Confederates attacked across the road from the right side of the frame towards the left.The McAdoo House, which sits behind the Kroger in a previous image, is one of the few remaining homes that survived the Battle of Kolb’s Farm and the Battle of Kennesaw Mountain. It sits atop a low ridge the Federals established their line along during the Battle of Kolb’s Farm. The Cheney House is a period home that survived the Civil War and is now home to apartments for “Senior Living”. General Schofield made his headquarters here during the Battle of Kolb’s Farm and throughout the remaining operations around Kennesaw Mountain. He occupied the home June 22 – June 30 and was visited here by General Sherman on the 23rd and the 25th of June.
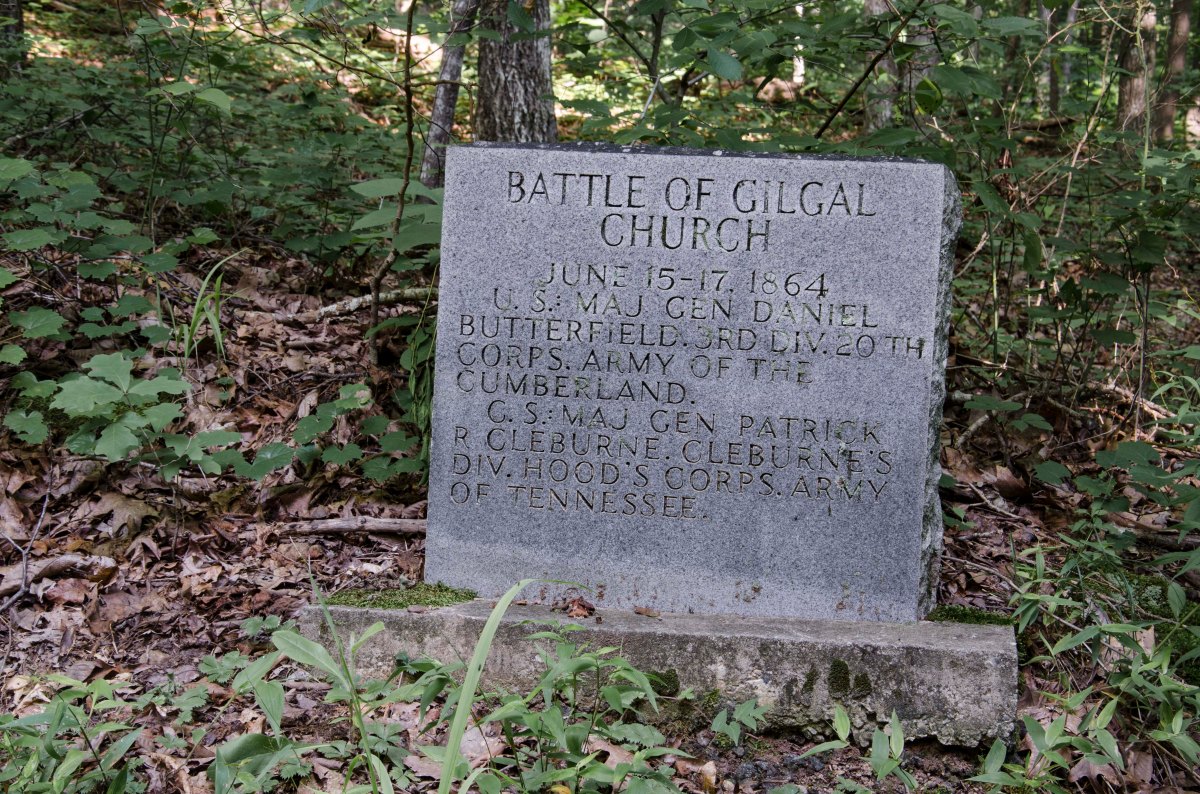
Heavy fighting happened today around the Latimer Farm portion of the Brushy Mountain – Mud Creek Line. The Marietta Country Club now sits on the former site of the Latimer Farm. The Confederate lines around the Latimer Farm formed a Salient angle, often called Hardee’s Salient, it was vulnerable to enfilading fire. Confederate positions were under near constant bombardment from Federal artillery positions no more than 1200 yards away. Three Federal Divisions, under the command of General Thomas, attacked the three Confederate Brigades at the Salient. The Union troops pushed the Confederate skirmishers back to their main lines and Federal troops soon occupied a trench line in front of the Salient. Once this line was occupied by the Federal troops, General Johnston realized the chances of the being overrun were high. On the night of the 18th, he ordered the evacuation of the line and the Confederate line then moved back to the famous Kennesaw Mountain Line.
Remnants of Confederate earthworks that were used during the Battle of Latimer’s Farm. Now located within the Barrett’s Green Subdivision, they were preserved in the local SCV Camp McDonald in conjunction with the builder. This area was under a near constant artillery bombardment.While hard to discern due to the undergrowth, this images shows a line of several Federal artillery positions. The are called Lunettes. It is rare to have some so well preserved and these have been protected on private property. The property is now being developed into a subdivision and the Lunettes are being protected through the work of the local SCV Camp McDonald and the developer.Remnants of Federal earthworks located on the same property as the Lunettes above. Efforts by the local SCV Camp McDonald and the developer to prevent the destruction of the remaining earthworks.This shallow depression is all that remains of this section of Confederate earthworks in the area of Hardee’s Salient. They are located on private property that has been farmed for sometime.The small collection of minie balls found on the property of a farmer who owns the property where the previous image was taken. He grew up on the family farm and still lives there today and as a teenager he claimed to have found a 55 gallon drums worth of minie balls in the fields which he sold to collectors. Look close and you may see one with teeth marks… Now covered with trees and thick underbrush, these remnants of Confederate earthworks, that were part of Hardee’s Salient, now sit quietly behind a local church.
Heavy skirmishing continued along the Lost Mountain, Mud Creek, Brushy Mountain Line. Heavy engagements happened in the area of Latimer’s Farm, now the Marietta Country Club. Calvary actions were also happening continuously on both flanks. General Johnston begins planning to move to his next defensive position at Kennesaw Mountain. General Sherman, who has become frustrated, begins to contemplate a direct assault on the Confederate lines as opposed to a flanking movement.
Looking south east along Hwy 120 where it crosses Mud Creek. The Confederates dug in atop the low rise in the distance in an attempt to stall the Federal advance as it crossed Mud Creek. Many, if not all, of the earthworks are now gone and are covered my subdivisions and shopping centers.Confederate earthworks at the far left (west end) of the Brushy Mountain Lost Mountain line. These works were manned by Jackson’s Calvary. These works were preserved by the local SCV Camp McDonald in conjunction with the Subdivisions builder and HOA. They are now preserved as a small park for the subdivision. Earthworks on the extreme right (East side) of the Brushy Mountain Lost Mountain line. These works are located on Brushy Mountain in a small subdivision. They are protected as a small park with historical information signs.“Hoods Fort” on Brushy Mountain stands a large earthwork fortification along with several thousand feet of preserved trenches. The exact purpose of the large fortification is unknown, but many speculate it was used as a ammunition bunker. You can get a sense of the scale from this image as you can look down the slope to the base of the fortification. A section of trenches curves its way around the base of the site known as “Hood’s Fort”
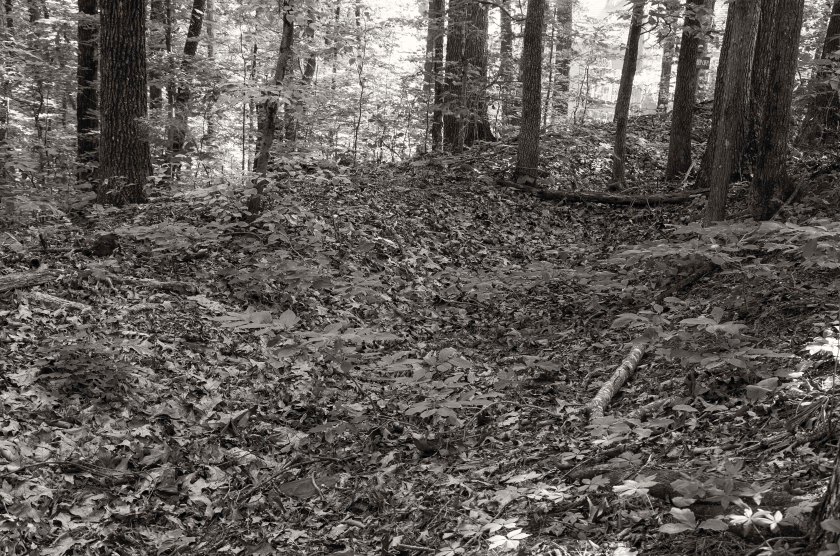
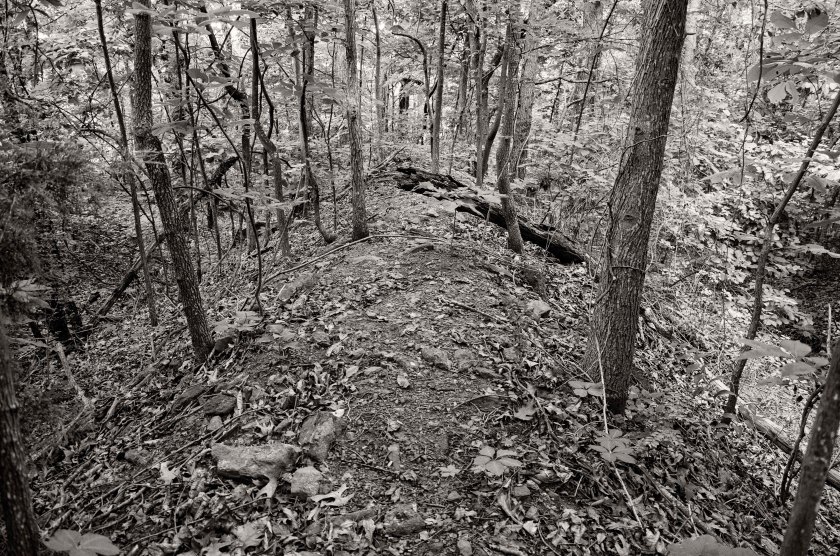
After the fighting at Gilgal Church on the 15th and continued fighting on the 16th, the Union Army has figured out that lines in the area form a salient and begin to pour in enfilading fire on the Confederates. Other Union forces move against the thin line of southern soldiers west of Gilgal Church towards Lost Mountain. Schofield’s XXIII Corps is now in a position to turn Johnston’s left flank, Schofield may or may not realize that he is in such an advantageous position, but Johnston does and orders Hardee’s Corp to pull back at dark, to the far side of Mud Creek and establish a new line. During this retrograde movement, a Union artillery shell explodes near Brigadier General Lucius Polk. He is the nephew of Lt. Gen. Leonidas Polk and only two days after the death of his Uncle, Lucius Polk is wounded and loses his leg.
Recreation of what Confederate earthworks may have looked like. Remnants of Confederate earthworks at the site of the Battle of Gilgal Church.
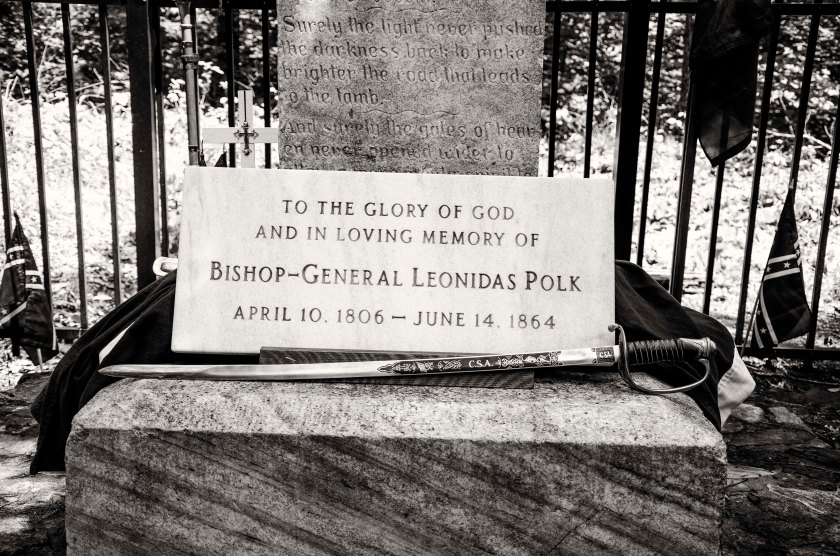
Being concerned that the position of Bate’s Division on Pine Mountain was quickly becoming compromised, Confederate Generals Johnston, Polk and Hardee, rode to the top of the mountain on the morning of the 14th. As the Generals were inspecting the position, they were observed by members of a Federal artillery battery located about a mile to the north east of the mountain. This was the 5th Indiana Battery. They observed what appeared to be officers on the mountain and opened fire. The first round buried it’s self in the parapet of the Confederate position and the second round struck General Leonidas Polk in the chest killing him instantly. Polk, also called the Bishop General was the Episcopal Bishop of Louisiana and was greatly revered by his men. His death struck a serious blow to the Confederacy.
Later on the 14th, Federal forces attacked Pine Mountain in an attempt to cut it off from the main Brushy Mountain Lost Mountain line. Pine Mountain formed a salient in the Confederate lines and was just over a mile to the north of the main line. The Federals pushed hard to cut Pine Mountain off from their main line, but were repeatedly repulsed by the well entrenched and fortified positions of the Confederates of Bate’s Division. General Johnston ordered Bate’s Division to with draw from the position on the night of the 14th under the cover of darkness.
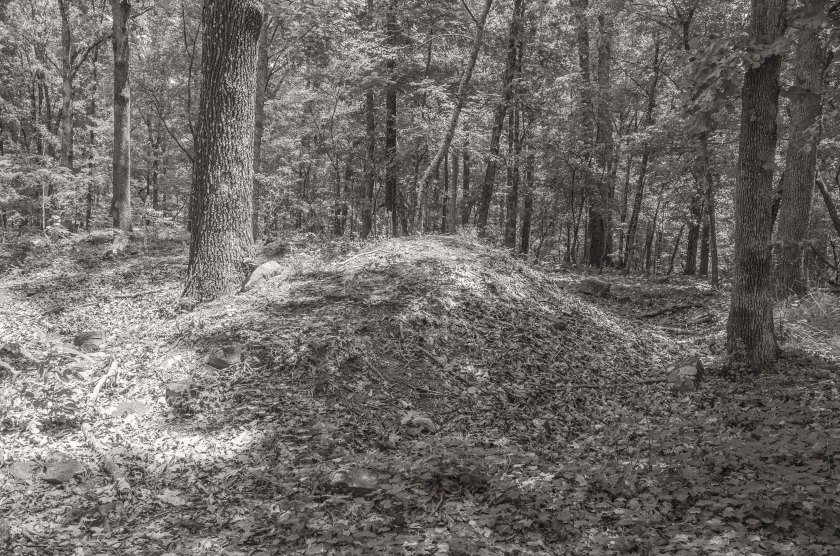
Location on top of Pine Mountain were General Leonidas Polk was fatal struck by an artillery round from the 5th Indiana BatteryRemnants of the parapet the took the first round from the 5th Indiana Battery. Earthworks atop Pine Mountain. These were manned by Bate’s Division.
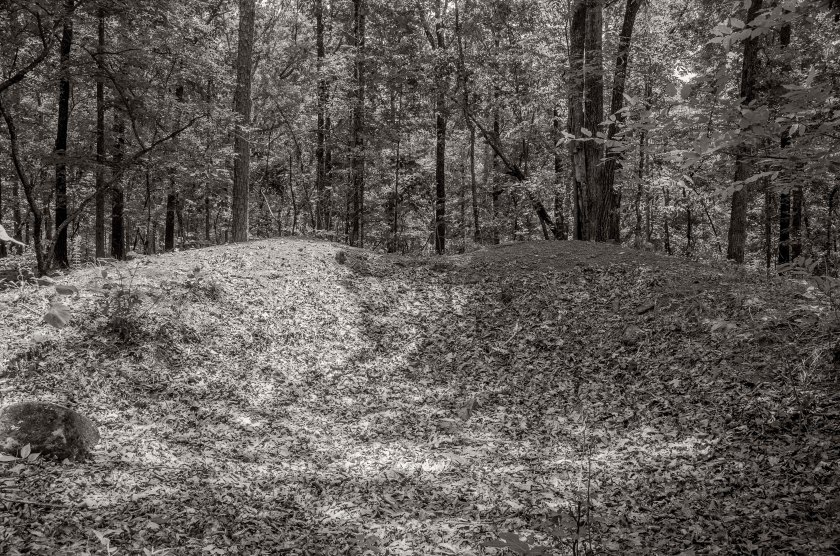
Now located behind a church, this is the position of the 5th Indiana Battery that fired the fatal shot killing General Leonidas Polk. It has been turned into a small nature trail for the church.Looking through the notch in the parapet wall of the 5th Indiana. One of the artillery pieces would have fired through this notch in the wall.From the 150th anniversary memorial ceremony held on Pine Mountain, June 14th 2014.F.D.Polk IV, 3rd Great Grandson of the General Leonidas Polk was present at the memorial service.During the memorial service a reenactor was portraying a Reverend and presided over the memorial service.Surviving Confederate earthworks of Bate’s Division where they repulsed the Federal attack on June 14th along the base and slopes of Pine Mountain.
Surviving Confederate earthworks of Bate’s Division where they repulsed the Federal attack on June 14th along the base and slopes of Pine Mountain.
Surviving Confederate earthworks of Bate’s Division where they repulsed the Federal attack on June 14th along the base and slopes of Pine Mountain.